AWS 上に Samba4 + Keycloak6 + FreeRADIUS3 な認証サーバを構築する
以前に Samba4 / FreeRADIUS3 / Keycloak6 の構築に関して、下記のメモを書きました。
今回はこれらを整理し、改めて「Samba4 + Keycloak6 + FreeRADIUS3」環境構築手順をメモしておきます。
今回の最終環境
今回は最終的に以下の環境を構築します。
- Amazon Linux release 2 (Karoo)
- Python 2.7.16
- Samba 4.10.6
- Keycloak 6.0.1
- Nginx 1.17.2-1
Samba のインストール
Samba をインストールしていきます。
時刻同期の確認
AmazonLinux はデフォルトで Amazon Time Sync Service と呼ばれる NTP サーバと時刻同期していまので、特に追加の時刻同期設定を行う必要はありません。 時刻同期の状態は chronyc sources で確認出来ます。
| # chronyc sources
210 Number of sources = 5
MS Name/IP address Stratum Poll Reach LastRx Last sample
===============================================================================
^* 169.254.169.123 3 4 377 7 -56us[ -58us] +/- 856us
^- ntp-5.jonlight.com 2 6 37 13 +456us[ +453us] +/- 24ms
^- jptyo5-ntp-004.aaplimg.c> 1 6 37 13 -84us[ -87us] +/- 2268us
^- kuroa.me 2 6 37 13 +857us[ +854us] +/- 57ms
^- 30-213-226-103-static.ch> 1 6 17 59 +1614us[+1849us] +/- 19ms
|
必要パッケージのインストール
Samba をインストールする事前準備として、前提となるパッケージをインストールします。 EPEL (Extra Packages for Enterprise Linux) からパッケージをインストールすることになりますが、AmazonLinux2 なので amazon-linux-extras を使って EPEL リポジトリをインストールします。
| yes | amazon-linux-extras install epel
|
必要なパッケージをインストールします。
1
2
3
4
5
6
7
8
9
10
11
12
13
14
15
16
17
18
19
20
21
22
23
24
25
26
27
28
29
30
31
32
33
34
35 | yum -y install \
attr \
bind-utils \
docbook-style-xsl \
gcc \
gdb \
gnutls-devel \
gpgme-devel \
jansson-devel \
keyutils-libs-devel \
krb5-workstation \
libacl-devel \
libaio-devel \
libarchive-devel \
libattr-devel \
libblkid-devel \
libsemanage-python \
libxml2-devel \
libxslt \
lmdb-devel \
openldap-devel \
pam-devel \
perl \
perl-ExtUtils-MakeMaker \
perl-Parse-Yapp \
perl-Test-Base \
pkgconfig \
policycoreutils-python \
popt-devel \
python-crypto \
python-devel \
python-gpgme \
readline-devel \
systemd-devel \
zlib-devel
|
ソースコードからインストールする
現時点ではリポジトリからインストール出来るのは 4.8.3 とバージョンがやや古く、しかも Samba をドメインコントローラとして構築する際には多用することになる samba-tool がなぜかインストールされません。 この件についてはネット上でも How to install samba-tool on Amazon Linux と質問されている方がおり、現時点では回答されていません。
1
2
3
4
5
6
7
8
9
10
11
12
13
14
15 | # yum info samba
Loaded plugins: extras_suggestions, langpacks, priorities, update-motd
190 packages excluded due to repository priority protections
Available Packages
Name : samba
Arch : x86_64
Version : 4.8.3
Release : 4.amzn2.0.1
Size : 682 k
Repo : amzn2-core/2/x86_64
Summary : Server and Client software to interoperate with Windows machines
URL : http://www.samba.org/
License : GPLv3+ and LGPLv3+
Description : Samba is the standard Windows interoperability suite of programs for Linux and
: Unix.
|
その為、今回はソースコードから Samba をインストールしていきます。 AmazonLinux2 標準の Python はバージョン 2.7.x 系である為、Python2 系である前提で作業していきます。 AmazonLinux2 デフォルトの Python2 を利用する為、make 時に Python2 を指定します。
| mkdir -p /usr/local/src/samba/
cd /usr/local/src/samba/
wget https://download.samba.org/pub/samba/samba-latest.tar.gz
tar zxvf samba-latest.tar.gz
cd samba-4.10.6/
PYTHON=python2 ./configure
PYTHON=python2 make
PYTHON=python2 make install
|
パスを追加する
ソースコードから Samba をインストールした場合、パスを指定しない限り実行ファイルは /usr/local/samba/bin 配下にインストールされます。 標準でここにはパスが通っていない為、利便性を考えてパスを通しておきます。 今回は root ユーザで操作することだけを想定し、/root/.bash_profile にパスを追加しました。
| echo "export PATH=\"/usr/local/samba/bin:/usr/local/samba/sbin:${PATH}\"" >> ~/.bash_profile
|
パス追加後は source ~/.bash_profile するか、または SSH アクセスをログアウト / ログインし直してパス追加を反映します。
ドメインを構築する
次はドメインを構築していきます。 対話的にドメインを構築する場合は以下のように実行します。
| samba-tool domain provision --use-rfc2307 --interactive
|
ある程度、パラメータを指定して非対話的に構築する場合は以下のように実行します。 非対話式の実行オプションを見る限り、DNS Forwarder の指定が見当たらないようですが、実際に非対話で実行した後で生成される設定ファイルを確認すると、「予め /etc/resolv.conf に設定されていた DNS サーバ」を DNS Forwarder として設定されていました。
| samba-tool domain provision \
--use-rfc2307 \
--realm=EXAMPLE.COM \
--server-role=dc \
--dns-backend=SAMBA_INTERNAL \
--domain=EXAMPLE \
--adminpass="PASSWORD"
|
ドメインを構築すると設定ファイルは /usr/local/samba/etc/smb.conf に生成されます。 例えば以下のような内容になっているはずです。
1
2
3
4
5
6
7
8
9
10
11
12
13
14
15
16 | # Global parameters
[global]
dns forwarder = 192.168.1.2
netbios name = AD
realm = EXAMPLE.COM
server role = active directory domain controller
workgroup = EXAMPLE
idmap_ldb:use rfc2307 = yes
[netlogon]
path = /usr/local/samba/var/locks/sysvol/example.com/scripts
read only = No
[sysvol]
path = /usr/local/samba/var/locks/sysvol
read only = No
|
LDAPS を強制しない設定
初期状態では LDAPS を強制する設定になっているようです。 セキュリティ上はこの方が好ましいですが、検証上の理由から LDAPS を強制しない設定へ変更するには /usr/local/samba/etc/smb.conf の [global] セクションへ以下を追加します。
| client ldap sasl wrapping = sign
ldap server require strong auth = no
|
LDAPS 接続用のサーバ証明書を用意する
LDAPS 接続にサーバ証明書を用意します。 自己証明書なり、Let's Encrypt で取得するなり、いずれかの方法で用意します。 取得した証明書や秘密鍵は /etc/letsencrypt/certificates に配置するものとします。
| mkdir -p /etc/letsencrypt/certificates
|
証明書 / 秘密鍵はパーミッションを修正し、所有者以外はアクセス出来ないようにしておきます。
| chmod 600 /etc/letsencrypt/certificates/*
|
配置した証明書 / 秘密鍵を参照するよう、/usr/local/samba/etc/smb.conf の [global] セクションに下記を追加します。
| tls enabled = yes
tls keyfile = /etc/letsencrypt/certificates/example.com.key
tls certfile = /etc/letsencrypt/certificates/example.com.crt
tls cafile = /etc/letsencrypt/certificates/example.com.issuer.crt
|
DNS 設定の変更
DNS の設定は以下の方針で変更します。
- AmazonLinux2 自身が参照する DNS サーバを自分自身 (127.0.0.1) にする
- SAMBA_INTERNAL な DNS サービスの DNS Forwarder は Amazon 提供の DNS サーバにする
初期状態のままでは DNS の設定を変更しても OS を再起動する度… というより、正確には DHCP Client が実行される度、DHCP サーバから受信した DNS サーバ設定を上書きしてしまいます。 これを避ける為、DHCP の設定を変更し、DNS 関連のパラメータは受信しない (上書きしない) ようにします。 具体的には /etc/sysconfig/network-scripts/ifcfg-eth0 のうち、PEERDNS=yes を no へ変更します。
| DEVICE=eth0
BOOTPROTO=dhcp
ONBOOT=yes
TYPE=Ethernet
USERCTL=yes
PEERDNS=no
DHCPV6C=yes
DHCPV6C_OPTIONS=-nw
PERSISTENT_DHCLIENT=yes
RES_OPTIONS="timeout:2 attempts:5"
DHCP_ARP_CHECK=no
|
ワンライナーで実行したければ以下のようにします。
| sed -i -e "s/PEERDNS=yes/PEERDNS=no/g" /etc/sysconfig/network-scripts/ifcfg-eth0
|
これで DNS 関連の設定は上書きされなくなりました。 続いて OS が参照する DNS サーバのアドレスを変更します。 対象の設定ファイルは /etc/resolv.conf です。 変更前は以下のようになっているはずです。
| options timeout:2 attempts:5
; generated by /usr/sbin/dhclient-script
search ap-northeast-1.compute.internal example.com
nameserver 192.168.1.2
|
これを以下のように nameserver 127.0.0.1 へ書き換えます。
| options timeout:2 attempts:5
; generated by /usr/sbin/dhclient-script
search ap-northeast-1.compute.internal example.com
nameserver 127.0.0.1
|
設定ファイルの修正が完了したら network サービスを再起動し、設定変更を反映します。
| systemctl restart network
|
起動&自動起動の設定
今回はパッケージマネージャでは無く、ソースコードから Samba をインストールした為、systemd 用のスクリプトがありません。 その為、以下の内容で systemd 用のスクリプトを新規作成しておきます。
1
2
3
4
5
6
7
8
9
10
11
12
13
14 | cat << EOF > /etc/systemd/system/samba.service
[Unit]
Description= Samba 4 Active Directory
After=syslog.target
After=network.target
[Service]
Type=forking
PIDFile=/usr/local/samba/var/run/samba.pid
ExecStart=/usr/local/samba/sbin/samba
[Install]
WantedBy=multi-user.target
EOF
|
これで systemctl コマンドを通じての起動や自動起動が行えるようになりました。 ファイルを追加したので daemon-reload した後、Samba を起動&自動起動するようにしておきます。
| systemctl daemon-reload
systemctl enable samba
systemctl start samba
|
OU / ユーザ / グループの作成
ドメインのセットアップが完了したので OU やユーザ、グループを作成していきます。 ほぼ全ての作業を samba-tool で実施していきます。 ここでは以下の作業を実施するものとします。
- ユーザ格納用に
People という OU を作成する
- グループ格納用に
Groups という OU を作成する
Groups OU 内に Members というグループを作成するPeople OU 内に User1 ユーザを Pass1 というパスワードで作成するUser1 ユーザのパスワード有効期限を「無期限」にするUser1 ユーザを Members グループに所属させる
この要件を満たす場合、実行するコマンドは以下の通りです。
| samba-tool ou create 'OU=People,DC=example,DC=com'
samba-tool ou create 'OU=Groups,DC=example,DC=com'
samba-tool group add Members --groupou='OU=Groups'
samba-tool user create User1 Pass1 --userou='OU=People'
samba-tool user setexpiry User1 --noexpiry
samba-tool group addmembers Members User1
|
Keycloak のインストール
続いて Keycloak をインストールしていきます。
Java のインストール
Keycloak は Java で書かれている為、まず Java をインストールします。
| amazon-linux-extras enable java-openjdk11
yum clean metadata
yum -y install java-11-openjdk
|
インストール
Keycloak をインストールするにはパッケージをダウンロードし、任意の位置に配置するだけです。 今回は /opt/keycloak 配下に配置しました。
| curl -O https://downloads.jboss.org/keycloak/6.0.1/keycloak-6.0.1.tar.gz
tar zxvf keycloak-6.0.1.tar.gz
mv keycloak-6.0.1/ /opt/keycloak
|
管理用ユーザの作成
初期状態ではユーザが存在しないので、Keycloak を起動する前に管理ユーザを作成します。
| /opt/keycloak/bin/add-user-keycloak.sh -r master -u [USERNAME] -p [PASSWORD]
|
proxy-address-forwarding の設定
今回は SSL/TLS 終端を Nginx に担当させる Reverse Proxy 構成にします。 その為、/opt/keycloak/standalone/configuration/standalone.xml の http-listner 定義箇所を探し、下記のように proxy-address-forwarding="true" の設定を追加します。
変更前
| <http-listener name="default" socket-binding="http" redirect-socket="https" enable-http2="true"/>
|
変更後
| <http-listener name="default" socket-binding="http" redirect-socket="https" enable-http2="true" proxy-address-forwarding="true"/>
|
ワンライナーで実行したい場合は以下のようにします。
| sed -i -e "s/<http-listener name=\"default\" socket-binding=\"http\" redirect-socket=\"https\" enable-http2=\"true\"\/>/<http-listener name=\"default\" socket-binding=\"http\" redirect-socket=\"https\" enable-http2=\"true\" proxy-address-forwarding=\"true\"\/>/g" /opt/keycloak/standalone/configuration/standalone.xml
|
サービス登録 及び 起動&自動起動設定
systemd から制御出来るよう、サービス登録を行います。
1
2
3
4
5
6
7
8
9
10
11
12
13
14
15
16
17
18 | cat << EOF > /etc/systemd/system/keycloak.service
[Unit]
Description=Jboss Application Server
After=network.target
[Service]
Type=idle
Environment=JBOSS_HOME=/opt/keycloak JBOSS_LOG_DIR=/var/log/keycloak "JAVA_OPTS=
-Xms1024m -Xmx20480m -XX:MaxPermSize=768m"
User=root
Group=root
ExecStart=/opt/keycloak/bin/standalone.sh
TimeoutStartSec=600
TimeoutStopSec=600
[Install]
WantedBy=multi-user.target
EOF
|
用意が出来ましたので、自動起動&起動設定を実施します。 Keycloak が完全に起動するまでには、やや時間がかかるかも知れません。
| systemctl daemon-reload
systemctl enable keycloak
systemctl start keycloak
|
フロントエンド用 Nginx の構築
続いて Keycloak のフロントエンド用 Nginx を構築します。 AmazonLinux 標準リポジトリ上の Nginx はややバージョンが古いので、Nginx の Mailline リポジトリからインストールします。 下記を実行し、Nginx 公式リポジトリを追加します。
| cat << EOF > /etc/yum.repos.d/nginx.repo
[nginx]
name=nginx repo
baseurl=http://nginx.org/packages/mainline/centos/7/\$basearch/
gpgcheck=1
enabled=1
gpgkey=https://nginx.org/keys/nginx_signing.key
EOF
|
Nginx をインストールします。
Nginx に Keycloak のフロントエンド処理をさせる為、以下の内容で /etc/nginx/conf.d/keycloak.conf を新規作成します。 証明書 / 秘密鍵は環境に応じて、パスを変更します。
1
2
3
4
5
6
7
8
9
10
11
12
13
14
15
16
17
18
19
20
21
22
23
24
25
26
27
28
29
30
31
32 | cat << EOF > /etc/nginx/conf.d/keycloak.conf
upstream keycloak {
server localhost:8080;
}
server {
listen 80;
server_name www.example.com;
return 301 https://\$host\$request_uri;
}
server {
listen 443 ssl http2;
server_name www.example.com;
ssl_certificate /etc/letsencrypt/certificates/example.com.crt;
ssl_certificate_key /etc/letsencrypt/certificates/example.com.key;
ssl_protocols TLSv1.1 TLSv1.2;
ssl_ciphers 'ECDH !aNULL !eNULL !SSLv2 !SSLv3';
proxy_set_header Host \$host;
proxy_set_header X-Real-IP \$remote_addr;
proxy_set_header X-Forwarded-Proto \$scheme;
proxy_set_header X-Forwarded-Host \$host;
proxy_set_header X-Forwarded-Server \$host;
proxy_set_header X-Forwarded-For \$proxy_add_x_forwarded_for;
location / {
proxy_pass http://keycloak;
proxy_redirect http:// https://;
}
}
EOF
|
Nginx の自動起動&起動設定を実施しておきます。
| systemctl enable nginx
systemctl start nginx
|
Keycloak を設定する
Step.1
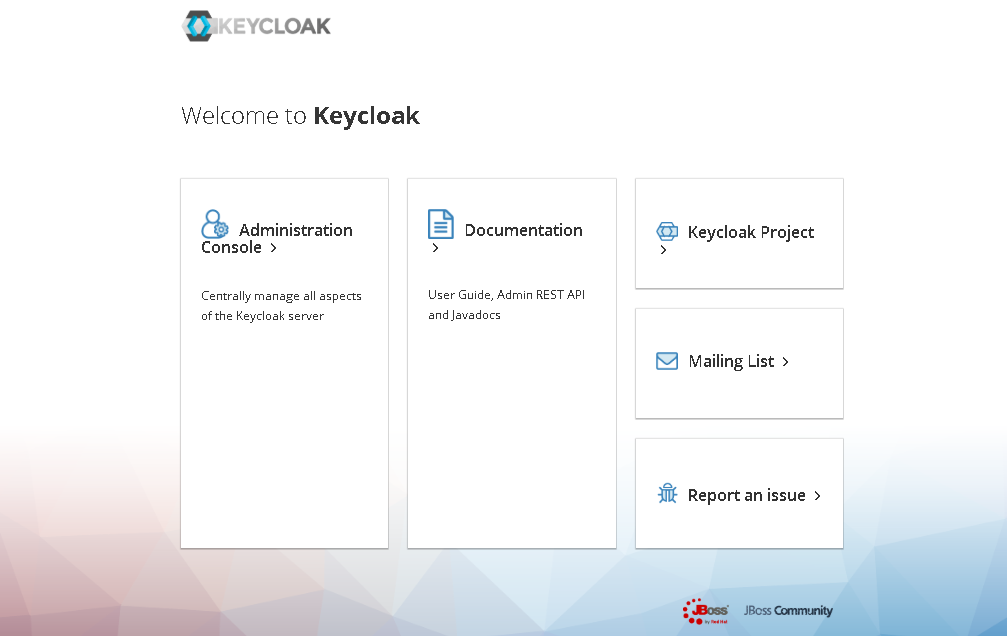
ブラウザから https:://www.example.com (FQDN は環境に応じて修正) へアクセスすることで以下のように Keycloak のログイン画面が表示されることを確認します。 トップ画面が表示されることが確認出来たら Administration Console をクリックします。
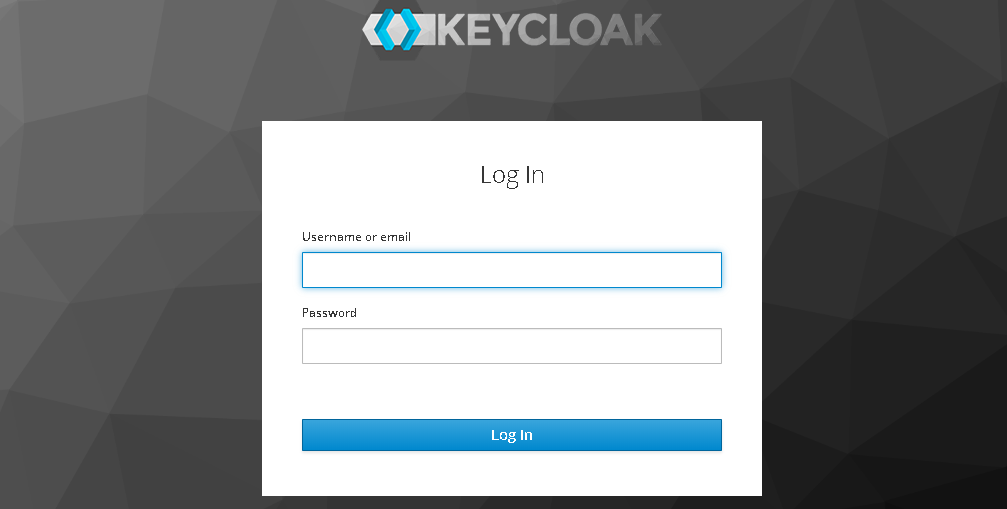
Step.2
管理ユーザ名とパスワードを入力してログインします。
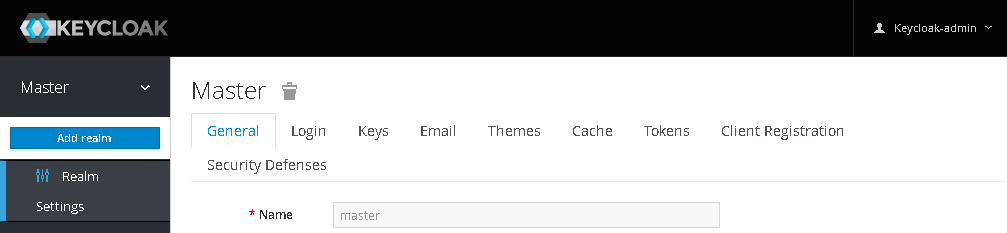
Step.3
デフォルトで Master という Realm が存在しています。 今回は新たに Relam を追加しますので、画面左上の Realm 名 (ここでは Master) にマウスカーソルを合わせ、表示されたメニューから Add realm をクリックします。
Step.4
Name に追加したい Realm 名を入力します。 今回は members にしました。

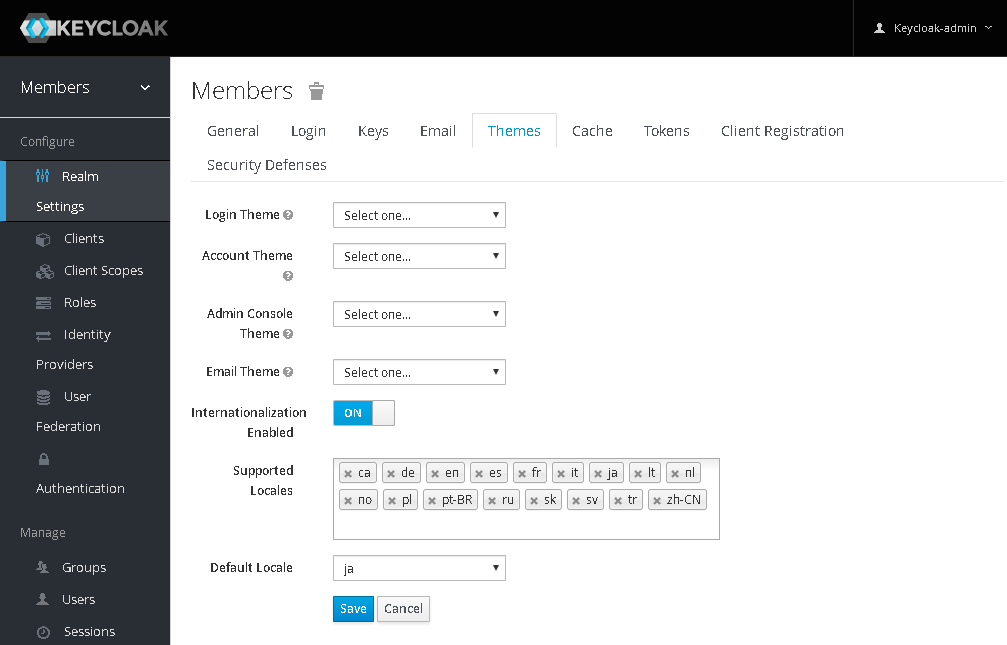
Step.5
必須の設定ではありませんが、表示を日本語化することも可能です。 Realm の Themes はデフォルトで以下のようになっていました。
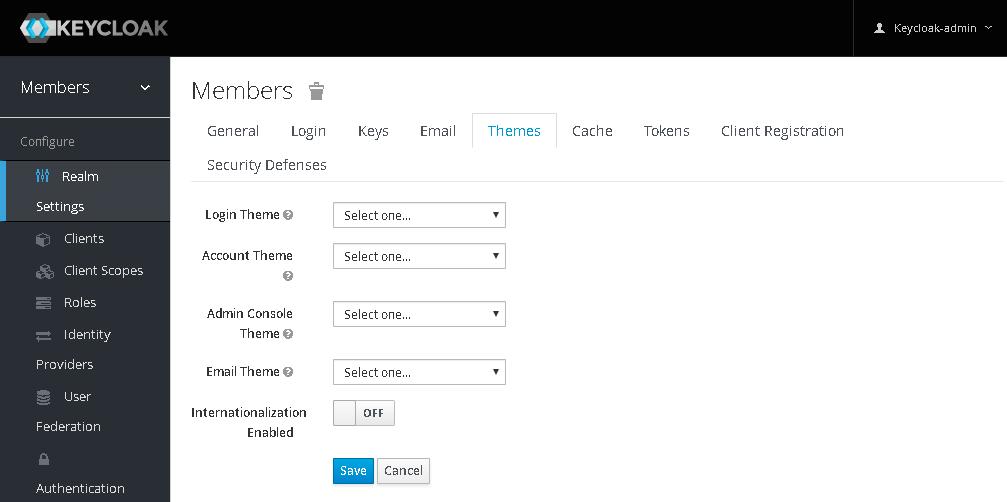
Internationalization Enabled を ON にするとサポートされる言語の一覧が表示されます。 Default Locale を ja にし、Save をクリックします。
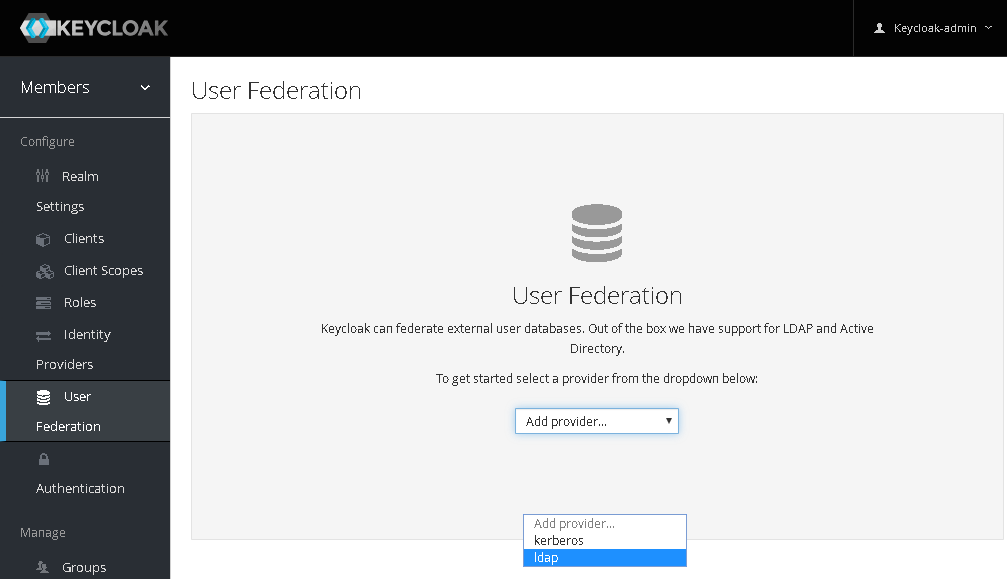
Step.6
今回はユーザ認証を Samba ドメインで行います。 Keycloak からは LDAP で Samba へ接続しますので、画面左側にあるメニューから User Federation をクリックし、Add provider... から ldap をクリックします。
Step.7
以下のように LDAP 接続用パラメータを入力する画面になります。

設定例は以下の通りです。
Required Settings
| 必須 |
項目 |
デフォルト値 |
設定例 |
|
Enabled |
ON |
ON |
|
Console Display Name |
ldap |
ldap |
|
Priority |
0 |
0 |
|
Import Users |
ON |
ON |
|
Edit Mode |
|
WRITABLE |
|
Sync Registrations |
OFF |
OFF |
| * |
Vendor |
|
Active Directory |
| * |
Username LDAP attribute |
|
sAMAccountName |
| * |
RDN LDAP attribute |
|
sAMAccountName |
| * |
UUID LDAP attribute |
|
objectGUID |
| * |
User Object Classes |
|
person, organizationalPerson, user |
| * |
Connection URL |
|
ldaps://127.0.0.1 |
| * |
Users DN |
|
OU=People,DC=example,DC=com |
| * |
Bind Type |
simple |
simple |
| * |
Bind DN |
|
CN=Administrator,CN=Users,DC=example,DC=com |
| * |
Bind Credential |
|
(Administrator のパスワード) |
|
Custom User LDAP Filter |
|
(&(objectCategory=Person)(sAMAccountName=*)(memberOf=CN=Members,OU=Groups,DC=example,DC=com)) |
|
Search Scope |
One Level |
One Level |
|
Validate Password Policy |
ON |
ON |
|
Use Truststore SPI |
Only for ldaps |
Only for ldaps |
|
Connection Pooling |
ON |
ON |
|
Connection Timeout |
|
|
|
Read Timeout |
|
|
|
Pagination |
ON |
ON |
Kerberos Integration
| 必須 |
項目 |
デフォルト値 |
設定例 |
|
Allow Kerberos authentication |
OFF |
OFF |
|
Use Kerberos For Password Authentication |
OFF |
OFF |
Sync Settings
| 必須 |
項目 |
デフォルト値 |
設定例 |
|
Batch Size |
1000 |
1000 |
|
Periodic Full Sync |
OFF |
OFF |
|
Periodic Changed Users Sync |
OFF |
OFF |
Cache Settings
| 必須 |
項目 |
デフォルト値 |
設定例 |
|
Cache Policy |
DEFAULT |
DEFAULT |
Step.8
LDAP との連携設定が終わってパラメータを保存したら、画面下部に幾つかボタンが表示されます。 このボタンのうち、Synchronize all users をクリックし、LDAP からユーザ情報を読み込みます。

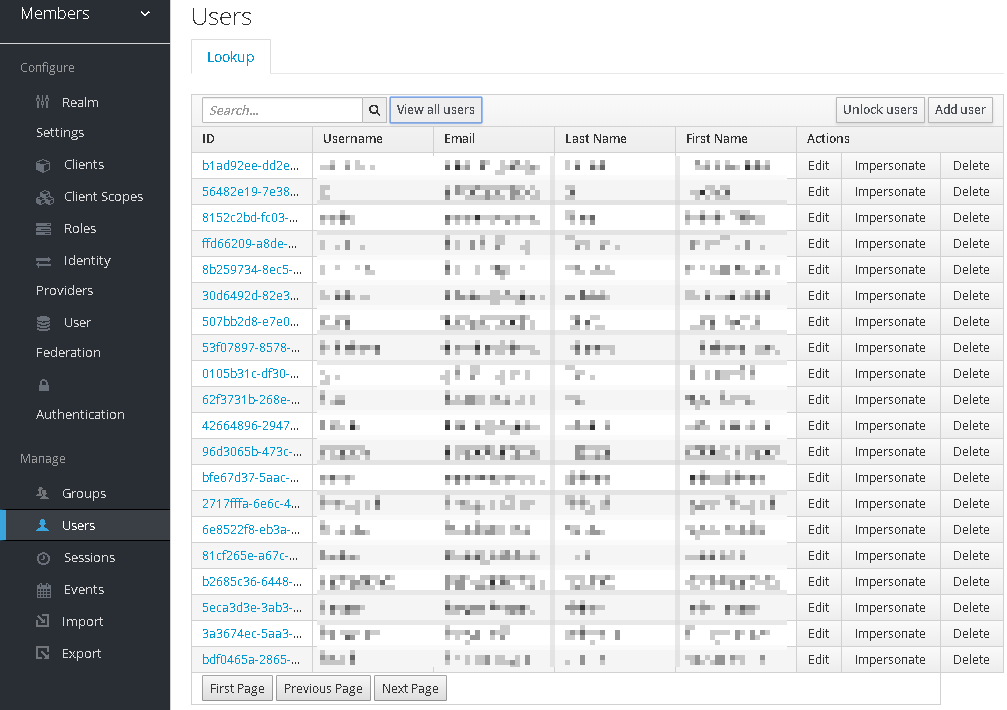
Step.9
左側のナビゲーションメニューから User を選択し、画面上部の View all users ボタンをクリックします。 LDAP と正しく連携出来ていれば、LDAP から読みだしたユーザ情報の一覧が表示されるはずです。
Step.10
以降は SAML や OpenID Connect で認証を行う SP 側の設定を左側のナビゲーションメニューの Clients から実施していきます。
FreeRADIUS のインストール
FreeRADIUS をインストールしていきます。
標準リポジトリからインストールする。
現時点で AmazonLinux の標準リポジトリからインストール出来る FreeRADIUS のバージョンは 3.0.13 でした。
1
2
3
4
5
6
7
8
9
10
11
12
13
14
15
16
17
18
19
20
21
22
23
24
25
26 | # yum info freeradius
Loaded plugins: extras_suggestions, langpacks, priorities, update-motd
190 packages excluded due to repository priority protections
Available Packages
Name : freeradius
Arch : x86_64
Version : 3.0.13
Release : 10.amzn2
Size : 1.1 M
Repo : amzn2-core/2/x86_64
Summary : High-performance and highly configurable free RADIUS server
URL : http://www.freeradius.org/
License : GPLv2+ and LGPLv2+
Description : The FreeRADIUS Server Project is a high performance and highly configurable
: GPL'd free RADIUS server. The server is similar in some respects to
: Livingston's 2.0 server. While FreeRADIUS started as a variant of the
: Cistron RADIUS server, they don't share a lot in common any more. It now has
: many more features than Cistron or Livingston, and is much more configurable.
:
: FreeRADIUS is an Internet authentication daemon, which implements the RADIUS
: protocol, as defined in RFC 2865 (and others). It allows Network Access
: Servers (NAS boxes) to perform authentication for dial-up users. There are
: also RADIUS clients available for Web servers, firewalls, Unix logins, and
: more. Using RADIUS allows authentication and authorization for a network to
: be centralized, and minimizes the amount of re-configuration which has to be
: done when adding or deleting new users.
|
FreeRADIUS をインストールします。
| yum -y install freeradius freeradius-ldap freeradius-utils
|
LDAP モジュールの設定
LDAP との接続は /etc/raddb/mods-available/ldap に定義されています。 設定例は以下の通りです。 ここでは 3 つの設定を行っています。
- ldap
- ldap admin (Admins グループで認証する)
- ldap members (Members グループで認証する)
 1
 2
 3
 4
 5
 6
 7
 8
 9
10
11
12
13
14
15
16
17
18
19
20
21
22
23
24
25
26
27
28
29
30
31
32
33
34
35
36
37
38
39
40
41
42
43
44
45
46
47
48
49
50
51
52
53
54 | ldap {
server = "127.0.0.1"
port = 389
identity = "CN=Administrator,CN=Users,DC=example,DC=com"
password = "PASSWORD"
update {
control:Password-With-Header += 'userPassword'
reply:Reply-Message += 'distinguishedName'
}
edir = no
user {
base_dn = "OU=People,DC=example,DC=com"
filter = "(sAMAccountName=%{%{Stripped-User-Name}:-%{User-Name}})"
}
}
ldap admins {
server = "127.0.0.1"
port = 389
identity = "CN=Administrator,CN=Users,DC=example,DC=com"
password = "PASSWORD"
update {
control:Password-With-Header += 'userPassword'
reply:Reply-Message += 'distinguishedName'
}
edir = no
user {
base_dn = "OU=People,DC=example,DC=com"
filter = "(&(sAMAccountName=%{%{Stripped-User-Name}:-%{User-Name}})(memberOf=CN=Admins,OU=Groups,DC=example,DC=com"))"
}
}
ldap members {
server = "127.0.0.1"
port = 389
identity = "CN=Administrator,CN=Users,DC=example,DC=com"
password = "PASSWORD"
update {
control:Password-With-Header += 'userPassword'
reply:Reply-Message += 'distinguishedName'
}
edir = no
user {
base_dn = "OU=People,DC=example,DC=com"
filter = "(&(sAMAccountName=%{%{Stripped-User-Name}:-%{User-Name}})(memberOf=CN=Members,OU=Groups,DC=example,DC=com))"
}
}
|
ファイルの用意が出来たらシンボリックリンクを作成し、有効化します。
| ln -s /etc/raddb/mods-available/ldap /etc/raddb/mods-enabled/ldap
|
サイトの設定
/etc/raddb/sites-available/ldap
 1
 2
 3
 4
 5
 6
 7
 8
 9
10
11
12
13
14
15
16
17
18
19
20
21 | cat << EOF > /etc/raddb/sites-available/ldap
server ldap {
authorize {
update {
control:Auth-Type := ldap
}
}
authenticate {
Auth-Type ldap {
ldap
}
}
post-auth {
Post-Auth-Type Reject {
}
}
}
WantedBy=multi-user.target
EOF
|
/etc/raddb/sites-available/ldap_admins
1
2
3
4
5
6
7
8
9
10
11
12
13
14
15
16
17
18
19
20
21
22
23
24 | cat << EOF > /etc/raddb/sites-available/ldap_admins
server ldap_admins {
authorize {
update {
control:Auth-Type := ldap
}
}
authenticate {
Auth-Type ldap {
admins
}
}
post-auth {
update reply {
cisco-avpair = "shell:priv-lvl=15",
Juniper-Local-User-Name = "superuser"
}
Post-Auth-Type Reject {
}
}
}
EOF
|
/etc/raddb/sites-available/ldap_members
1
2
3
4
5
6
7
8
9
10
11
12
13
14
15
16
17
18
19
20
21
22
23
24 | cat << EOF > /etc/raddb/sites-available/ldap_members
server ldap_members {
authorize {
update {
control:Auth-Type := ldap
}
}
authenticate {
Auth-Type ldap {
members
}
}
post-auth {
update reply {
cisco-avpair = "shell:priv-lvl=15",
Juniper-Local-User-Name = "superuser"
}
Post-Auth-Type Reject {
}
}
}
EOF
|
ファイルの用意が出来たらシンボリックリンクを作成し、有効化します。
| ln -s /etc/raddb/sites-available/ldap /etc/raddb/sites-enabled/ldap
ln -s /etc/raddb/sites-available/ldap_admins /etc/raddb/sites-enabled/ldap_admins
ln -s /etc/raddb/sites-available/ldap_members /etc/raddb/sites-enabled/ldap_members
|
クライアントの定義
 1
 2
 3
 4
 5
 6
 7
 8
 9
10
11
12
13
14
15
16
17
18
19
20 | cat << EOF > /etc/raddb/clients.conf
client 10.0.0.1/32 {
ipaddr = 10.0.0.1
netmask = 32
secret = SECRET1
virtual_server = ldap
}
client 10.0.0.2/32 {
ipaddr = 10.0.0.2
netmask = 32
secret = SECRET2
virtual_server = ldap_admins
}
client 10.0.0.3/32 {
ipaddr = 10.0.0.3
aetmask = 32
secret = SECRET3
virtual_server = ldap_members
}
EOF
|
起動&自動起動の設定
これで FreeRADIUS の設定は完了です。 デーモンを起動&自動起動設定します。
| systemctl start radiusd
systemctl enable radiusd
|
認証テストを実施する
radtest を使うと RADIUS の認証テストを行うことが出来ます。 実行例は以下の通りです。
| radtest [USERNAME] [PASSWORD] [ADDRESS] 0 [SECRET]
|
参考
/etc/raddb/mods-available/ldap
1
2
3
4
5
6
7
8
9
10
11
12
13
14
15
16
17
18
19
20
21
22
23
24
25
26
27
28
29
30
31
32
33
34
35
36
37
38
39
40
41
42
43
44
45
46
47
48
49
50
51
52
53
54
55
56
57
58
59
60
61
62
63
64
65
66
67
68
69
70
71
72
73
74
75
76
77
78
79
80
81
82
83
84
85
86
87
88
89
90
91
92
93
94
95
96
97
98
99
100
101
102
103
104
105
106
107
108
109
110
111
112
113
114
115
116
117
118
119
120
121
122
123
124
125
126
127
128
129
130
131
132
133
134
135
136
137
138
139
140
141
142
143
144
145
146
147
148
149
150
151
152
153
154
155
156
157
158
159
160
161
162
163
164
165
166
167
168
169
170
171
172
173
174
175
176
177
178
179
180
181
182
183
184
185
186
187
188
189
190
191
192
193
194
195
196
197
198
199
200
201
202
203
204
205
206
207
208
209
210
211
212
213
214
215
216
217
218
219
220
221
222
223
224
225
226
227
228
229
230
231
232
233
234
235
236
237
238
239
240
241
242
243
244
245
246
247
248
249
250
251
252
253
254
255
256
257
258
259
260
261
262
263
264
265
266
267
268
269
270
271
272
273
274
275
276
277
278
279
280
281
282
283
284
285
286
287
288
289
290
291
292
293
294
295
296
297
298
299
300
301
302
303
304
305
306
307
308
309
310
311
312
313
314
315
316
317
318
319
320
321
322
323
324
325
326
327
328
329
330
331
332
333
334
335
336
337
338
339
340
341
342
343
344
345
346
347
348
349
350
351
352
353
354
355
356
357
358
359
360
361
362
363
364
365
366
367
368
369
370
371
372
373
374
375
376
377
378
379
380
381
382
383
384
385
386
387
388
389
390
391
392
393
394
395
396
397
398
399
400
401
402
403
404
405
406
407
408
409
410
411
412
413
414
415
416
417
418
419
420
421
422
423
424
425
426
427
428
429
430
431
432
433
434
435
436
437
438
439
440
441
442
443
444
445
446
447
448
449
450
451
452
453
454
455
456
457
458
459
460
461
462
463
464
465
466
467
468
469
470
471
472
473
474
475
476
477
478
479
480
481
482
483
484
485
486
487
488
489
490
491
492
493
494
495
496
497
498
499
500
501
502
503
504
505
506
507
508
509
510
511
512
513
514
515
516
517
518
519
520
521
522
523
524
525
526
527
528
529
530
531
532
533
534
535
536
537
538
539
540
541
542
543
544
545
546
547
548
549
550
551
552
553
554
555
556
557
558
559
560
561
562
563
564
565
566
567
568
569
570
571
572
573
574
575
576
577
578
579
580
581
582 | # cat ldap
# -*- text -*-
#
# $Id: 4b7e4585c029b8617aa7b9169a42bf50a5ec4938 $
#
# Lightweight Directory Access Protocol (LDAP)
#
ldap {
# Note that this needs to match the name(s) in the LDAP server
# certificate, if you're using ldaps. See OpenLDAP documentation
# for the behavioral semantics of specifying more than one host.
#
# Depending on the libldap in use, server may be an LDAP URI.
# In the case of OpenLDAP this allows additional the following
# additional schemes:
# - ldaps:// (LDAP over SSL)
# - ldapi:// (LDAP over Unix socket)
# - ldapc:// (Connectionless LDAP)
server = 'localhost'
# server = 'ldap.rrdns.example.org'
# server = 'ldap.rrdns.example.org'
# Port to connect on, defaults to 389, will be ignored for LDAP URIs.
# port = 389
# Administrator account for searching and possibly modifying.
# If using SASL + KRB5 these should be commented out.
# identity = 'cn=admin,dc=example,dc=org'
# password = mypass
# Unless overridden in another section, the dn from which all
# searches will start from.
base_dn = 'dc=example,dc=org'
#
# SASL parameters to use for admin binds
#
# When we're prompted by the SASL library, these control
# the responses given, as well as the identity and password
# directives above.
#
# If any directive is commented out, a NULL response will be
# provided to cyrus-sasl.
#
# Unfortunately the only way to control Keberos here is through
# environmental variables, as cyrus-sasl provides no API to
# set the krb5 config directly.
#
# Full documentation for MIT krb5 can be found here:
#
# http://web.mit.edu/kerberos/krb5-devel/doc/admin/env_variables.html
#
# At a minimum you probably want to set KRB5_CLIENT_KTNAME.
#
sasl {
# SASL mechanism
# mech = 'PLAIN'
# SASL authorisation identity to proxy.
# proxy = 'autz_id'
# SASL realm. Used for kerberos.
# realm = 'example.org'
}
#
# Generic valuepair attribute
#
# If set, this will attribute will be retrieved in addition to any
# mapped attributes.
#
# Values should be in the format:
# <radius attr> <op> <value>
#
# Where:
# <radius attr>: Is the attribute you wish to create
# with any valid list and request qualifiers.
# <op>: Is any assignment operator (=, :=, +=, -=).
# <value>: Is the value to parse into the new valuepair.
# If the value is wrapped in double quotes it
# will be xlat expanded.
# valuepair_attribute = 'radiusAttribute'
#
# Mapping of LDAP directory attributes to RADIUS dictionary attributes.
#
# WARNING: Although this format is almost identical to the unlang
# update section format, it does *NOT* mean that you can use other
# unlang constructs in module configuration files.
#
# Configuration items are in the format:
# <radius attr> <op> <ldap attr>
#
# Where:
# <radius attr>: Is the destination RADIUS attribute
# with any valid list and request qualifiers.
# <op>: Is any assignment attribute (=, :=, +=, -=).
# <ldap attr>: Is the attribute associated with user or
# profile objects in the LDAP directory.
# If the attribute name is wrapped in double
# quotes it will be xlat expanded.
#
# Request and list qualifiers may also be placed after the 'update'
# section name to set defaults destination requests/lists
# for unqualified RADIUS attributes.
#
# Note: LDAP attribute names should be single quoted unless you want
# the name value to be derived from an xlat expansion, or an
# attribute ref.
update {
control:Password-With-Header += 'userPassword'
# control:NT-Password := 'ntPassword'
# reply:Reply-Message := 'radiusReplyMessage'
# reply:Tunnel-Type := 'radiusTunnelType'
# reply:Tunnel-Medium-Type := 'radiusTunnelMediumType'
# reply:Tunnel-Private-Group-ID := 'radiusTunnelPrivategroupId'
# Where only a list is specified as the RADIUS attribute,
# the value of the LDAP attribute is parsed as a valuepair
# in the same format as the 'valuepair_attribute' (above).
control: += 'radiusControlAttribute'
request: += 'radiusRequestAttribute'
reply: += 'radiusReplyAttribute'
}
# Set to yes if you have eDirectory and want to use the universal
# password mechanism.
# edir = no
# Set to yes if you want to bind as the user after retrieving the
# Cleartext-Password. This will consume the login grace, and
# verify user authorization.
# edir_autz = no
# Note: set_auth_type was removed in v3.x.x
# Equivalent functionality can be achieved by adding the following
# stanza to the authorize {} section of your virtual server.
#
# ldap
# if ((ok || updated) && User-Password) {
# update {
# control:Auth-Type := ldap
# }
# }
#
# User object identification.
#
user {
# Where to start searching in the tree for users
base_dn = "${..base_dn}"
# Filter for user objects, should be specific enough
# to identify a single user object.
#
# For Active Directory, you should use
# "samaccountname=" instead of "uid="
#
filter = "(uid=%{%{Stripped-User-Name}:-%{User-Name}})"
# SASL parameters to use for user binds
#
# When we're prompted by the SASL library, these control
# the responses given.
#
# Any of the config items below may be an attribute ref
# or and expansion, so different SASL mechs, proxy IDs
# and realms may be used for different users.
sasl {
# SASL mechanism
# mech = 'PLAIN'
# SASL authorisation identity to proxy.
# proxy = &User-Name
# SASL realm. Used for kerberos.
# realm = 'example.org'
}
# Search scope, may be 'base', 'one', sub' or 'children'
# scope = 'sub'
# Server side result sorting
#
# A list of space delimited attributes to order the result
# set by, if the filter matches multiple objects.
# Only the first result in the set will be processed.
#
# If the attribute name is prefixed with a hyphen '-' the
# sorting order will be reversed for that attribute.
#
# If sort_by is set, and the server does not support sorting
# the search will fail.
# sort_by = '-uid'
# If this is undefined, anyone is authorised.
# If it is defined, the contents of this attribute
# determine whether or not the user is authorised
# access_attribute = 'dialupAccess'
# Control whether the presence of 'access_attribute'
# allows access, or denys access.
#
# If 'yes', and the access_attribute is present, or
# 'no' and the access_attribute is absent then access
# will be allowed.
#
# If 'yes', and the access_attribute is absent, or
# 'no' and the access_attribute is present, then
# access will not be allowed.
#
# If the value of the access_attribute is 'false', it
# will negate the result.
#
# e.g.
# access_positive = yes
# access_attribute = userAccessAllowed
#
# With an LDAP object containing:
# userAccessAllowed: false
#
# Will result in the user being locked out.
# access_positive = yes
}
#
# User membership checking.
#
group {
# Where to start searching in the tree for groups
base_dn = "${..base_dn}"
# Filter for group objects, should match all available
# group objects a user might be a member of.
filter = '(objectClass=posixGroup)'
# Search scope, may be 'base', 'one', sub' or 'children'
# scope = 'sub'
# Attribute that uniquely identifies a group.
# Is used when converting group DNs to group
# names.
# name_attribute = cn
# Filter to find group objects a user is a member of.
# That is, group objects with attributes that
# identify members (the inverse of membership_attribute).
# membership_filter = "(|(member=%{control:Ldap-UserDn})(memberUid=%{%{Stripped-User-Name}:-%{User-Name}}))"
# The attribute in user objects which contain the names
# or DNs of groups a user is a member of.
#
# Unless a conversion between group name and group DN is
# needed, there's no requirement for the group objects
# referenced to actually exist.
membership_attribute = 'memberOf'
# If cacheable_name or cacheable_dn are enabled,
# all group information for the user will be
# retrieved from the directory and written to LDAP-Group
# attributes appropriate for the instance of rlm_ldap.
#
# For group comparisons these attributes will be checked
# instead of querying the LDAP directory directly.
#
# This feature is intended to be used with rlm_cache.
#
# If you wish to use this feature, you should enable
# the type that matches the format of your check items
# i.e. if your groups are specified as DNs then enable
# cacheable_dn else enable cacheable_name.
# cacheable_name = 'no'
# cacheable_dn = 'no'
# Override the normal cache attribute (<inst>-LDAP-Group or
# LDAP-Group if using the default instance) and create a
# custom attribute. This can help if multiple module instances
# are used in fail-over.
# cache_attribute = 'LDAP-Cached-Membership'
}
#
# User profiles. RADIUS profile objects contain sets of attributes
# to insert into the request. These attributes are mapped using
# the same mapping scheme applied to user objects (the update section above).
#
profile {
# Filter for RADIUS profile objects
# filter = '(objectclass=radiusprofile)'
# The default profile. This may be a DN or an attribute
# reference.
# To get old v2.2.x style behaviour, or to use the
# &User-Profile attribute to specify the default profile,
# set this to &control:User-Profile.
# default = 'cn=radprofile,dc=example,dc=org'
# The LDAP attribute containing profile DNs to apply
# in addition to the default profile above. These are
# retrieved from the user object, at the same time as the
# attributes from the update section, are are applied
# if authorization is successful.
# attribute = 'radiusProfileDn'
}
#
# Bulk load clients from the directory
#
client {
# Where to start searching in the tree for clients
base_dn = "${..base_dn}"
#
# Filter to match client objects
#
filter = '(objectClass=radiusClient)'
# Search scope, may be 'base', 'one', 'sub' or 'children'
# scope = 'sub'
#
# Sets default values (not obtained from LDAP) for new client entries
#
template {
# login = 'test'
# password = 'test'
# proto = tcp
# require_message_authenticator = yes
# Uncomment to add a home_server with the same
# attributes as the client.
# coa_server {
# response_window = 2.0
# }
}
#
# Client attribute mappings are in the format:
# <client attribute> = <ldap attribute>
#
# The following attributes are required:
# * ipaddr | ipv4addr | ipv6addr - Client IP Address.
# * secret - RADIUS shared secret.
#
# All other attributes usually supported in a client
# definition are also supported here.
#
# Schemas are available in doc/schemas/ldap for openldap and eDirectory
#
attribute {
ipaddr = 'radiusClientIdentifier'
secret = 'radiusClientSecret'
# shortname = 'radiusClientShortname'
# nas_type = 'radiusClientType'
# virtual_server = 'radiusClientVirtualServer'
# require_message_authenticator = 'radiusClientRequireMa'
}
}
# Load clients on startup
# read_clients = no
#
# Modify user object on receiving Accounting-Request
#
# Useful for recording things like the last time the user logged
# in, or the Acct-Session-ID for CoA/DM.
#
# LDAP modification items are in the format:
# <ldap attr> <op> <value>
#
# Where:
# <ldap attr>: The LDAP attribute to add modify or delete.
# <op>: One of the assignment operators:
# (:=, +=, -=, ++).
# Note: '=' is *not* supported.
# <value>: The value to add modify or delete.
#
# WARNING: If using the ':=' operator with a multi-valued LDAP
# attribute, all instances of the attribute will be removed and
# replaced with a single attribute.
accounting {
reference = "%{tolower:type.%{Acct-Status-Type}}"
type {
start {
update {
description := "Online at %S"
}
}
interim-update {
update {
description := "Last seen at %S"
}
}
stop {
update {
description := "Offline at %S"
}
}
}
}
#
# Post-Auth can modify LDAP objects too
#
post-auth {
update {
description := "Authenticated at %S"
}
}
#
# LDAP connection-specific options.
#
# These options set timeouts, keep-alives, etc. for the connections.
#
options {
# Control under which situations aliases are followed.
# May be one of 'never', 'searching', 'finding' or 'always'
# default: libldap's default which is usually 'never'.
#
# LDAP_OPT_DEREF is set to this value.
# dereference = 'always'
#
# The following two configuration items control whether the
# server follows references returned by LDAP directory.
# They are mostly for Active Directory compatibility.
# If you set these to 'no', then searches will likely return
# 'operations error', instead of a useful result.
#
chase_referrals = yes
rebind = yes
# Seconds to wait for LDAP query to finish. default: 20
res_timeout = 10
# Seconds LDAP server has to process the query (server-side
# time limit). default: 20
#
# LDAP_OPT_TIMELIMIT is set to this value.
srv_timelimit = 3
# Seconds to wait for response of the server. (network
# failures) default: 10
#
# LDAP_OPT_NETWORK_TIMEOUT is set to this value.
net_timeout = 1
# LDAP_OPT_X_KEEPALIVE_IDLE
idle = 60
# LDAP_OPT_X_KEEPALIVE_PROBES
probes = 3
# LDAP_OPT_X_KEEPALIVE_INTERVAL
interval = 3
# ldap_debug: debug flag for LDAP SDK
# (see OpenLDAP documentation). Set this to enable
# huge amounts of LDAP debugging on the screen.
# You should only use this if you are an LDAP expert.
#
# default: 0x0000 (no debugging messages)
# Example:(LDAP_DEBUG_FILTER+LDAP_DEBUG_CONNS)
ldap_debug = 0x0028
}
#
# This subsection configures the tls related items
# that control how FreeRADIUS connects to an LDAP
# server. It contains all of the 'tls_*' configuration
# entries used in older versions of FreeRADIUS. Those
# configuration entries can still be used, but we recommend
# using these.
#
tls {
# Set this to 'yes' to use TLS encrypted connections
# to the LDAP database by using the StartTLS extended
# operation.
#
# The StartTLS operation is supposed to be
# used with normal ldap connections instead of
# using ldaps (port 636) connections
# start_tls = yes
# ca_file = ${certdir}/cacert.pem
# ca_path = ${certdir}
# certificate_file = /path/to/radius.crt
# private_key_file = /path/to/radius.key
# random_file = /dev/urandom
# Certificate Verification requirements. Can be:
# 'never' (do not even bother trying)
# 'allow' (try, but don't fail if the certificate
# cannot be verified)
# 'demand' (fail if the certificate does not verify)
# 'hard' (similar to 'demand' but fails if TLS
# cannot negotiate)
#
# The default is libldap's default, which varies based
# on the contents of ldap.conf.
# require_cert = 'demand'
}
# As of version 3.0, the 'pool' section has replaced the
# following configuration items:
#
# ldap_connections_number
# The connection pool is new for 3.0, and will be used in many
# modules, for all kinds of connection-related activity.
#
# When the server is not threaded, the connection pool
# limits are ignored, and only one connection is used.
pool {
# Connections to create during module instantiation.
# If the server cannot create specified number of
# connections during instantiation it will exit.
# Set to 0 to allow the server to start without the
# directory being available.
start = ${thread[pool].start_servers}
# Minimum number of connections to keep open
min = ${thread[pool].min_spare_servers}
# Maximum number of connections
#
# If these connections are all in use and a new one
# is requested, the request will NOT get a connection.
#
# Setting 'max' to LESS than the number of threads means
# that some threads may starve, and you will see errors
# like 'No connections available and at max connection limit'
#
# Setting 'max' to MORE than the number of threads means
# that there are more connections than necessary.
max = ${thread[pool].max_servers}
# Spare connections to be left idle
#
# NOTE: Idle connections WILL be closed if "idle_timeout"
# is set. This should be less than or equal to "max" above.
spare = ${thread[pool].max_spare_servers}
# Number of uses before the connection is closed
#
# 0 means "infinite"
uses = 0
# The number of seconds to wait after the server tries
# to open a connection, and fails. During this time,
# no new connections will be opened.
retry_delay = 30
# The lifetime (in seconds) of the connection
lifetime = 0
# Idle timeout (in seconds). A connection which is
# unused for this length of time will be closed.
idle_timeout = 60
# NOTE: All configuration settings are enforced. If a
# connection is closed because of 'idle_timeout',
# 'uses', or 'lifetime', then the total number of
# connections MAY fall below 'min'. When that
# happens, it will open a new connection. It will
# also log a WARNING message.
#
# The solution is to either lower the 'min' connections,
# or increase lifetime/idle_timeout.
}
}
|