macOS に Cursor をインストールし、Azure OpenAI Service を利用する
ここ最近、ChatGPT 連携機能を (プラグインでは無く) 本体に取り込んでいる Cursor の記事や動画をよく目にします。 ですが、いずれの情報も「OpenAI 社の ChatGPT 利用を前提」にしているものばかりに思えます。 そこで今回は macOS へ Cursor をインストールしつつ、Azure OpenAI Service を利用する為の設定手順をメモしておきます。
前提条件 / 方針
今回は下記の前提や方針で作業をしました。
- macOS 14.2 (Sonoma) 上で作業を実施
- Azure OpenAI Service のリソースはデプロイ済み
- Cursor はゼロから設定する (=VS Code の設定や機能拡張は引き継がない)
- CLI からは以下で各々、異なるアプリケーションを実行するように設定する
code で VS Code を実行cursor で Cursor を実行
Azure Portal での事前作業
Cursor インストール後は「Azure OpenAI Service の API キー」を設定することになります。 事前に API キーを確認しておきます。
Step.1
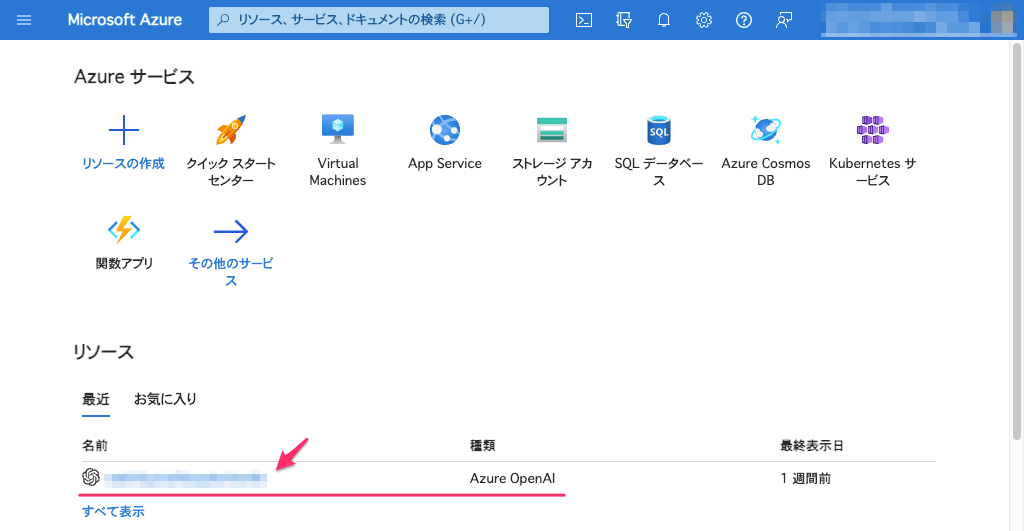
Azure Portal へログインしたら Azure OpenAI のリソースをクリックします。
Step.2
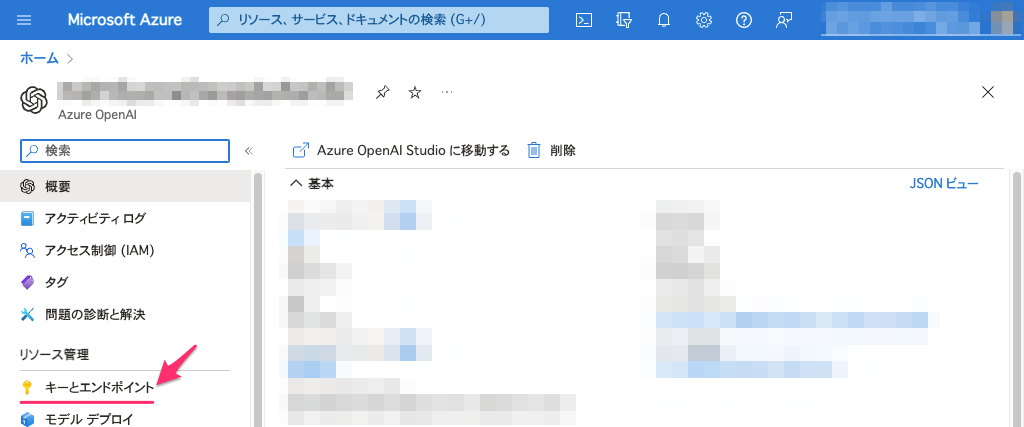
キーとエンドポイント をクリックします。
Step.3
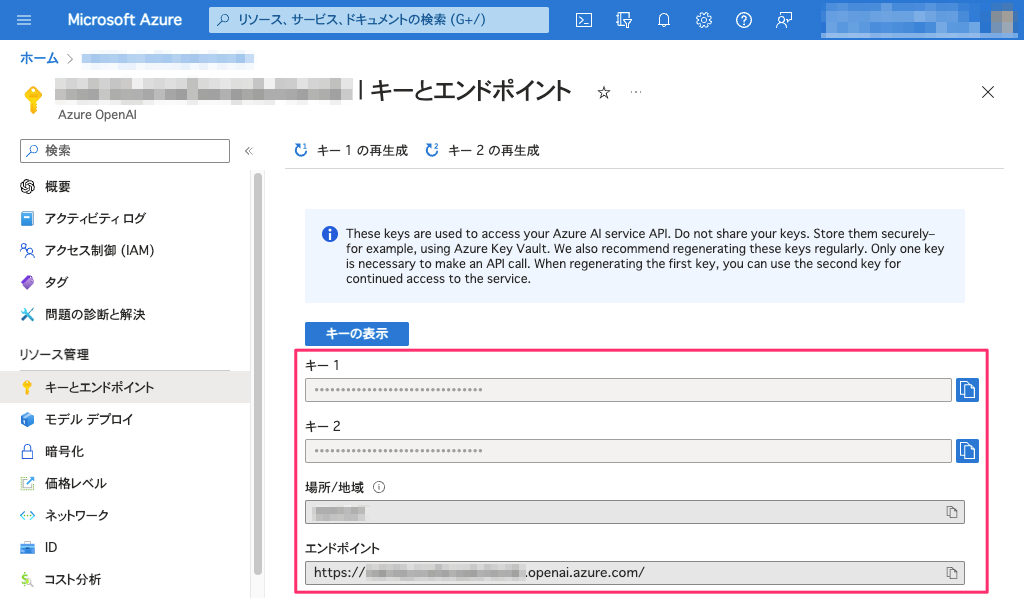
Azure OpenAI Service を API として利用する為に必要な「API キー」や「エンドポイントの URL」などが表示されます。 後の手順で必要となる為、情報を控えておきます。
Step.4
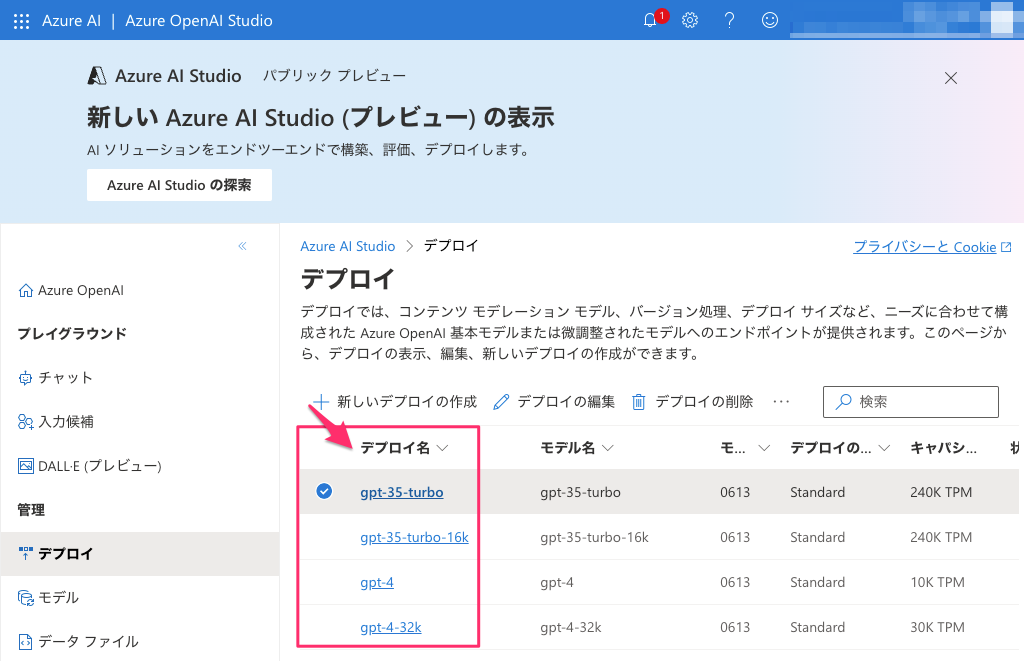
また、Cursor で Azure OpenAI Service の設定を行う際は「デプロイ名」(Deployment Name) も必要になります。 Azure AI Studio へログインし、利用したいモデルのデプロイ名を確認し、こちらも同様に情報を控えておきます。
Cursor のインストール
続けて Cursor をインストールします。
Step.5
Cursor の公式サイトからダウンロードします。

ダウンロードした .zip を展開すると (アプリケーション形式では無く) インストーラ形式のバイナリが現れます。

これをダブルクリックしてインストーラを開始します。 インターネットからダウンロードしたバイナリである為、「実行して良いか?」という確認ダイアログが表示されました。 Open をクリックして続行します。

Step.6
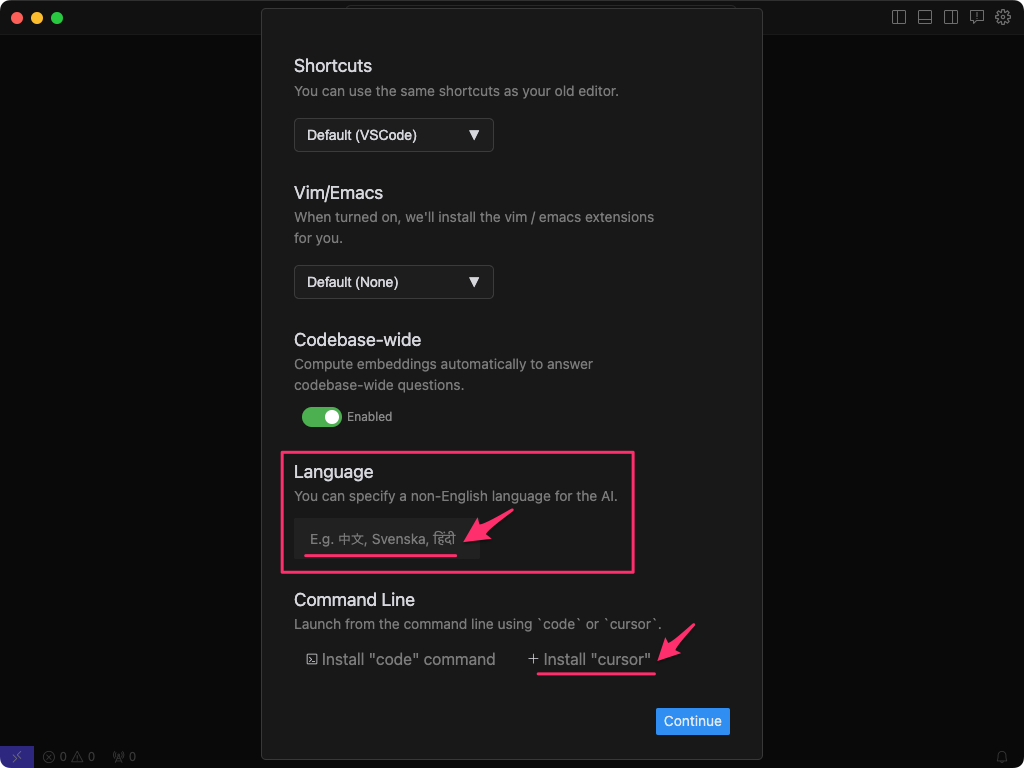
インストールオプションが表示されます。 Language は「英語以外の言語で生成 AI へ質問した際、どの言語として扱うか?」を指定するようです。 ここを空欄のままでインストールすると生成 AI へ日本語で問い合わせを行っても、回答が英語になってしまいます。 今回は 日本語 と入力します。
Warning
一度インストーラを終了してしまうと、現状のバージョンでは GUI や設定ファイルから簡単にこの設定を変更することは出来ないように見えましたので、設定は慎重に行います。
また、CLI から cursor を実行した際に「Cursor を実行する」為、Install "cursor" をクリックして次へ進みます。
Step.7
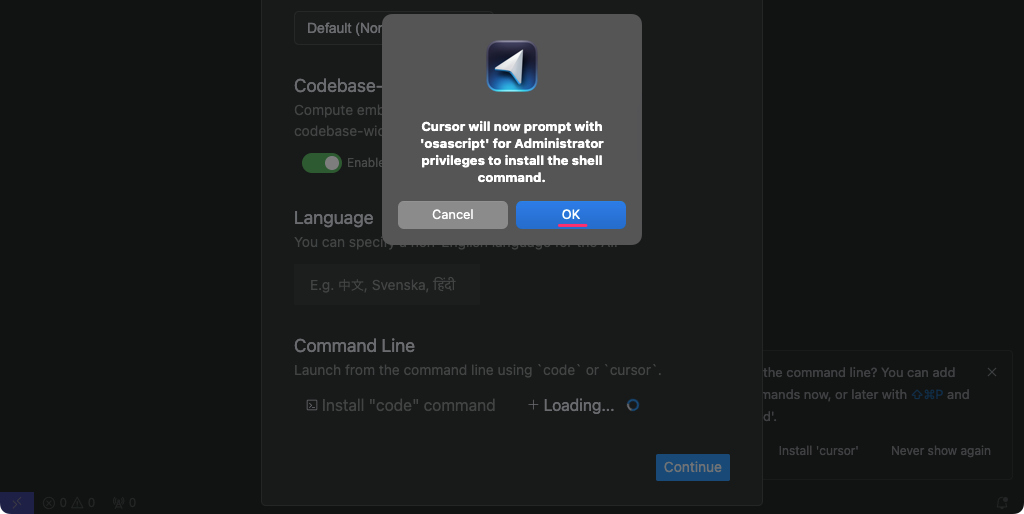
アドミン権限で Apple Script をインストールして良いか、確認するダイアログが表示されます。 OK をクリックします。
Step.8
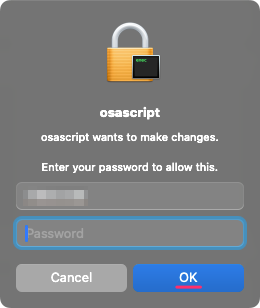
更に確認ダイアログが表示されますので OK をクリックします。
Step.9
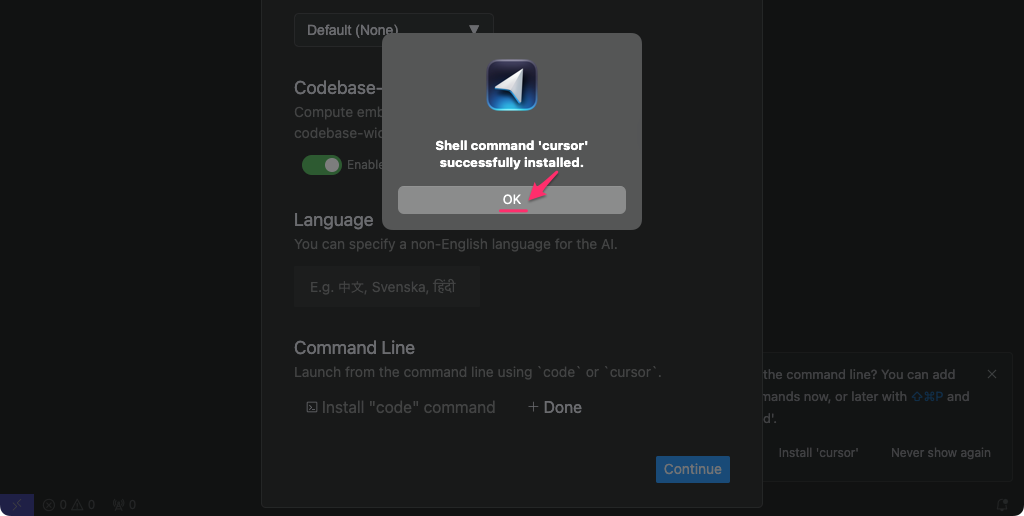
CLI から利用出来る cursor コマンドがインストールされました。 Command Line の Install "cursor" も Done 表示に変わっていることが分かります。 OK をクリックします。
Tip
cursor コマンドは /usr/local/bin/cursor にインストールされました。
Step.10
Continue をクリックして次へ進みます。

Step.11
VSCode の機能拡張を引き継ぐか、確認されます。 今回は上述の通り「引き継がない」方針ですので Start from Scratch をクリックして次へ進みます。

Step.12
少なくても現時点の Cursor は「Cursor の有料サービスを利用せず、Azure OpenAI Service」を利用する」としても Cursor アカウントが必須のようです。 既に Cursor アカウントを取得してあれば Log In を、アカウント未取得であれば Sign Up をクリックしてアカウントを取得します。

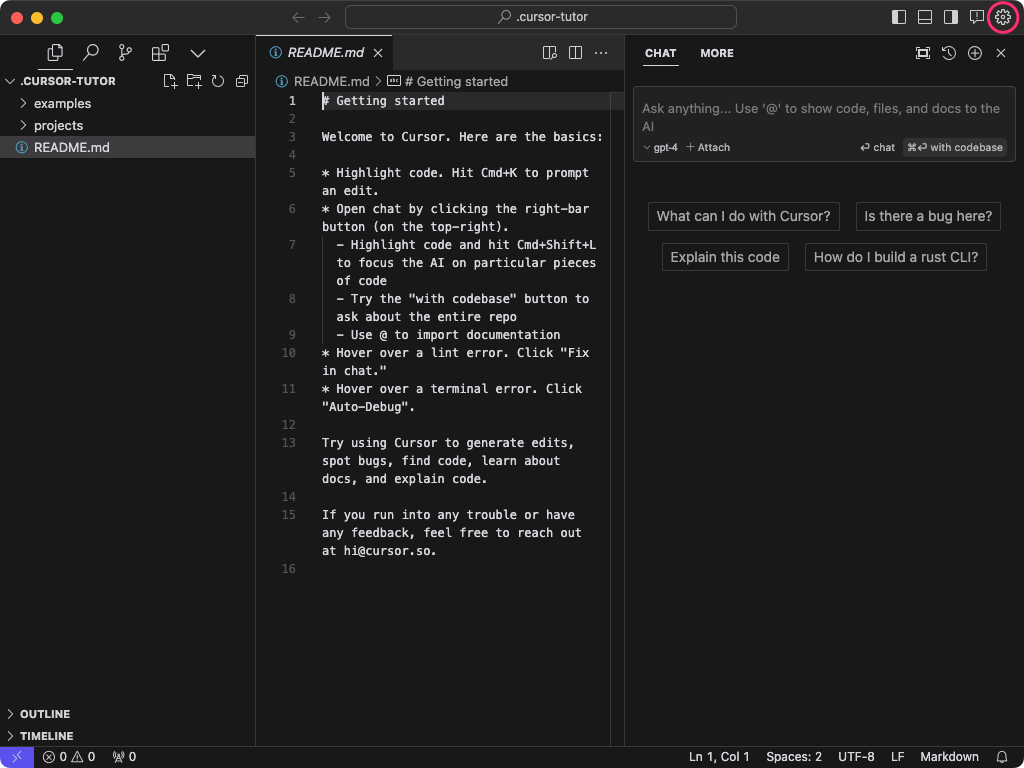
Step.13
Cursor が起動しました。 Azure OpenAI Service の API キーを設定する為、画面右上のギアアイコンをクリックします。
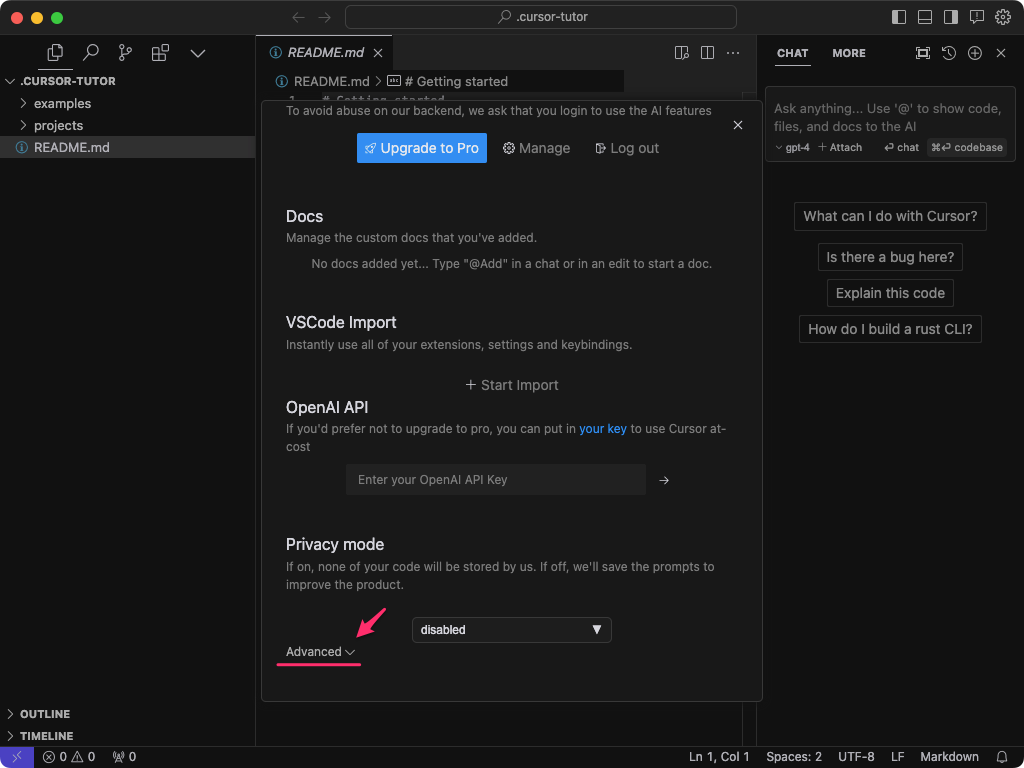
Step.14
設定画面が表示されますが、標準状態では (OpenAI API キーの設定は表示されますが) Azure OpenAI Service の API キー設定欄が表示されません。 下部にある Advanced をクリックします。
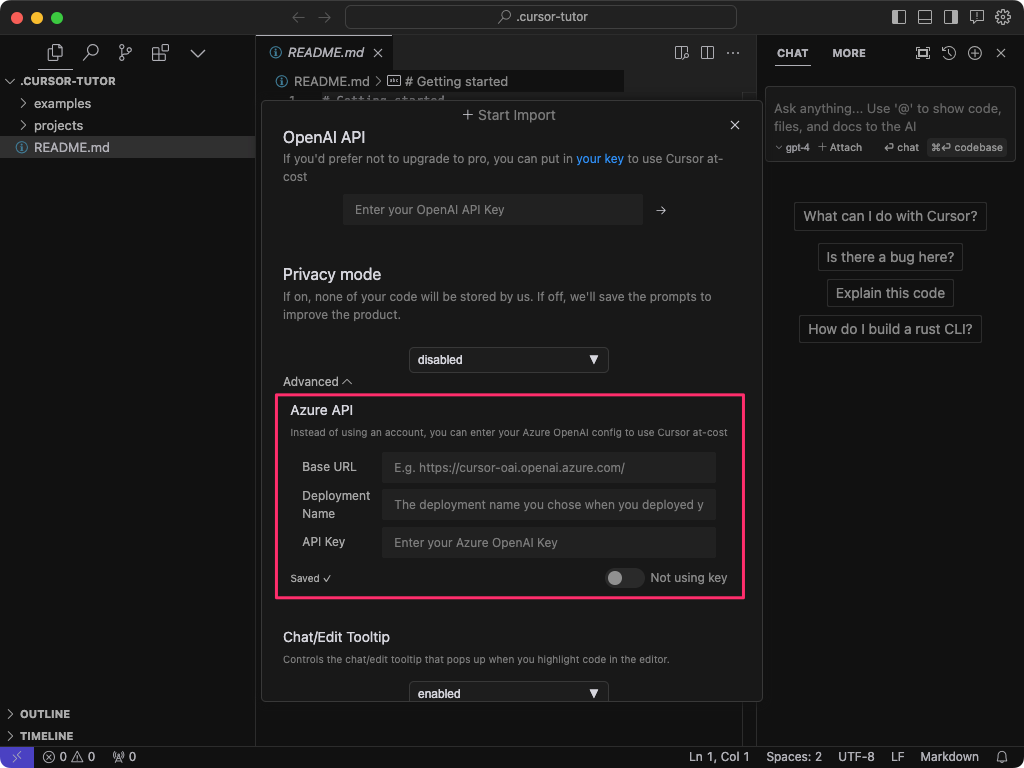
これで Azure OpenAI Service の設定欄が表示されます。 予め Azure Portal / Azure AI Studio で控えてあった情報を入力します。 「設定の保存」のようなボタンは無く、値を入力してウインドウを閉じれば設定は保存されています。
これで英語または日本語で Azure OpenAI Service へ問い合わせを実行出来るようになりました。
参考
cursor コマンドのヘルプ
 1
 2
 3
 4
 5
 6
 7
 8
 9
10
11
12
13
14
15
16
17
18
19
20
21
22
23
24
25
26
27
28
29
30
31
32
33
34
35
36
37
38
39
40
41
42
43
44
45
46
47
48
49
50
51
52
53
54
55
56
57
58
59
60
61
62
63
64
65
66
67
68
69 | $ cursor --help
Cursor 0.16.0
Usage: cursor [options][paths...]
To read from stdin, append '-' (e.g. 'ps aux | grep code | cursor -')
Options
-d --diff <file> <file> Compare two files with each other.
-m --merge <path1> <path2> <base> <result> Perform a three-way merge by providing paths for two modified versions
of a file, the common origin of both modified versions and the output
file to save merge results.
-a --add <folder> Add folder(s) to the last active window.
-g --goto <file:line[:character]> Open a file at the path on the specified line and character position.
-n --new-window Force to open a new window.
-r --reuse-window Force to open a file or folder in an already opened window.
-w --wait Wait for the files to be closed before returning.
--locale <locale> The locale to use (e.g. en-US or zh-TW).
--user-data-dir <dir> Specifies the directory that user data is kept in. Can be used to open
multiple distinct instances of Code.
--profile <profileName> Opens the provided folder or workspace with the given profile and
associates the profile with the workspace. If the profile does not
exist, a new empty one is created.
-h --help Print usage.
Extensions Management
--extensions-dir <dir> Set the root path for extensions.
--list-extensions List the installed extensions.
--show-versions Show versions of installed extensions, when using --list-extensions.
--category <category> Filters installed extensions by provided category, when using
--list-extensions.
--install-extension <ext-id | path> Installs or updates an extension. The argument is either an extension id or a
path to a VSIX. The identifier of an extension is '${publisher}.${name}'.
Use '--force' argument to update to latest version. To install a specific
version provide '@${version}'. For example: 'vscode.csharp@1.2.3'.
--pre-release Installs the pre-release version of the extension, when using
--install-extension
--uninstall-extension <ext-id> Uninstalls an extension.
--enable-proposed-api <ext-id> Enables proposed API features for extensions. Can receive one or more
extension IDs to enable individually.
Troubleshooting
-v --version Print version.
--verbose Print verbose output (implies --wait).
--log <level> Log level to use. Default is 'info'. Allowed values are 'critical', 'error',
'warn', 'info', 'debug', 'trace', 'off'. You can also configure the log level of
an extension by passing extension id and log level in the following format:
'${publisher}.${name}:${logLevel}'. For example: 'vscode.csharp:trace'. Can
receive one or more such entries.
-s --status Print process usage and diagnostics information.
--prof-startup Run CPU profiler during startup.
--disable-extensions Disable all installed extensions. This option is not persisted and is effective
only when the command opens a new window.
--disable-extension <ext-id> Disable the provided extension. This option is not persisted and is effective
only when the command opens a new window.
--sync <on | off> Turn sync on or off.
--inspect-extensions <port> Allow debugging and profiling of extensions. Check the developer tools for the
connection URI.
--inspect-brk-extensions <port> Allow debugging and profiling of extensions with the extension host being paused
after start. Check the developer tools for the connection URI.
--disable-gpu Disable GPU hardware acceleration.
--disable-chromium-sandbox Use this option only when there is requirement to launch the application as sudo
user on Linux or when running as an elevated user in an applocker environment on
Windows.
--telemetry Shows all telemetry events which VS code collects.
Subcommands
tunnel Make the current machine accessible from vscode.dev or other machines through a secure tunnel
serve-web Run a server that displays the editor UI in browsers.
|