Skip to content

PHP

Rocky Linux8 + Nginx + PHP 8.1 + h5ai で DirectoryIndex を見栄え良くする

以前に Nginx 関連で下記のメモを書きました。

今回は Rocky Linux 8 上の Nginx と PHP 8.1 環境へ、更に h5ai をインストールして DirectoryIndex の見栄えを改善してみましたので、手順をメモしておきます。 Nginx と PHP をインストールするまでの手順は過去のメモと同じです。

Rocky Linux8 に Nginx と remi から PHP 8.1 をインストールする

Rocky Linux 8 へ Nginx と PHP 8.1 をインストールする手順をメモしておきます。 PHP は remi からインストールしました。

Nginx のインストール

Nginx をインストールします。

1
2
dnf config-manager --add-repo https://s3.sig9.org/repos/nginx.repo
dnf install -y nginx

PHP のインストール

remi から PHP をインストールします。 敢えて現時点で最新のバージョン 8.1 をインストールしてみました。

1
2
dnf -y install https://rpms.remirepo.net/enterprise/remi-release-8.rpm
dnf -y install php81

php-fpm の設定

php-fpm の設定ファイルは /etc/opt/remi/php81/php-fpm.d/www.conf にあります。 ユーザやグループ等の設定を書き換えます。 デフォルトでは listen.acl_users で POSIX ACL が有効になっていた為、これを無効化して listen.ownerlisten.group を利用出来るようにしています。

1
2
3
4
5
6
sed -i -e "s/^user = apache/user = nginx/g" /etc/opt/remi/php81/php-fpm.d/www.conf
sed -i -e "s/^group = apache/group = nginx/g" /etc/opt/remi/php81/php-fpm.d/www.conf
sed -i -e "s/^;listen.owner = nobody/listen.owner = nginx/g" /etc/opt/remi/php81/php-fpm.d/www.conf
sed -i -e "s/^;listen.group = nobody/listen.group = nginx/g" /etc/opt/remi/php81/php-fpm.d/www.conf
sed -i -e "s/^;listen.mode = 0660/listen.mode = 0660/g" /etc/opt/remi/php81/php-fpm.d/www.conf
sed -i -e "s/^listen.acl_users = apache/;listen.acl_users = apache/g" /etc/opt/remi/php81/php-fpm.d/www.conf

Nginx の設定

Nginx の設定ファイルのうち、/etc/nginx/conf.d/default.conf を以下のように修正します。 拡張子 .php のファイルは UNIX ソケット経由で php-fpm へ転送します。

 1
 2
 3
 4
 5
 6
 7
 8
 9
10
11
12
13
14
15
16
17
18
19
20
21
22
23
24
25
cat << 'EOF' > /etc/nginx/conf.d/default.conf
server {
    listen       80;
    server_name  localhost;

    location / {
        root   /usr/share/nginx/html;
        index  index.php index.html index.htm;
    }

    error_page   500 502 503 504  /50x.html;
    location = /50x.html {
        root   /usr/share/nginx/html;
    }

    location ~ \.php$ {
        fastcgi_split_path_info ^(.+\.php)(/.+)$;
        root           /usr/share/nginx/html;
        fastcgi_pass   unix:/var/opt/remi/php81/run/php-fpm/www.sock;
        fastcgi_index  index.php;
        include        fastcgi_params;
        fastcgi_param  SCRIPT_FILENAME  $document_root$fastcgi_script_name;
    }
}
EOF

PHP テスト用ファイルの作成

phpinfo を呼び出すテスト用ファイルを作成します。

1
2
3
4
5
cat << 'EOF' > /usr/share/nginx/html/info.php
<?php
  phpinfo();
?>
EOF

Nginx と php-fpm の起動

ここまでの準備が完了したら Nginx と php-fpm を起動&自動起動設定します。

1
2
systemctl start nginx.service php81-php-fpm.service
systemctl enable nginx.service php81-php-fpm.service

テスト用ファイルの表示

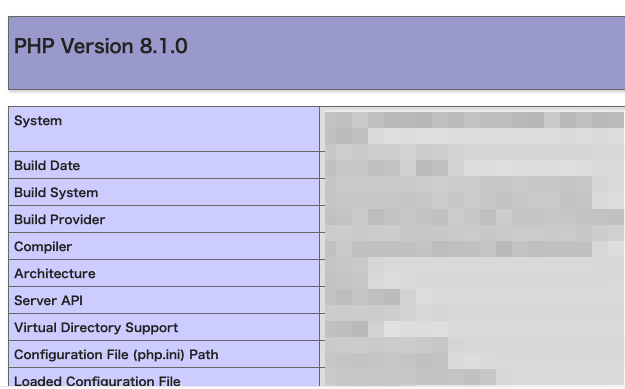
ブラウザから http://ADDRESS/info.php へアクセスし、phpinfo の内容が表示されれば正常です。

file

参考

/etc/nginx/conf.d/default.conf の初期内容

 1
 2
 3
 4
 5
 6
 7
 8
 9
10
11
12
13
14
15
16
17
18
19
20
21
22
23
24
25
26
27
28
29
30
31
32
33
34
35
36
37
38
39
40
41
42
43
server {
    listen       80;
    server_name  localhost;

    #access_log  /var/log/nginx/host.access.log  main;

    location / {
        root   /usr/share/nginx/html;
        index  index.html index.htm;
    }

    #error_page  404              /404.html;

    # redirect server error pages to the static page /50x.html
    #
    error_page   500 502 503 504  /50x.html;
    location = /50x.html {
        root   /usr/share/nginx/html;
    }

    # proxy the PHP scripts to Apache listening on 127.0.0.1:80
    #
    #location ~ \.php$ {
    #    proxy_pass   http://127.0.0.1;
    #}

    # pass the PHP scripts to FastCGI server listening on 127.0.0.1:9000
    #
    #location ~ \.php$ {
    #    root           html;
    #    fastcgi_pass   127.0.0.1:9000;
    #    fastcgi_index  index.php;
    #    fastcgi_param  SCRIPT_FILENAME  /scripts$fastcgi_script_name;
    #    include        fastcgi_params;
    #}

    # deny access to .htaccess files, if Apache's document root
    # concurs with nginx's one
    #
    #location ~ /\.ht {
    #    deny  all;
    #}
}

Amazon Linux2 に PHP 7.4 をインストールする

Amazon Linux2 に PHP 7.4 をインストールする手順をメモしておきます。

EPEL と remi を有効化し、remi から PHP をインストールします。

1
2
3
4
yum -y install \
  https://dl.fedoraproject.org/pub/epel/epel-release-latest-7.noarch.rpm \
  http://rpms.famillecollet.com/enterprise/remi-release-7.rpm
yum -y install --enablerepo=remi-php74 php74

今回は PHP 7.4.12 がインストールされました。

1
2
3
4
# php74 -v
PHP 7.4.12 (cli) (built: Oct 27 2020 15:01:52) ( NTS )
Copyright (c) The PHP Group
Zend Engine v3.4.0, Copyright (c) Zend Technologies

CentOS 5.6 で PHP を 5.1.6 → 5.3.6 へバージョンアップする

PHP: date - Manual によると、php の date 関数は PHP 5.2.2 以降でマイクロ秒を表示する書式「u」をサポートしたそうです。試験環境でこの関数とオプション(マイクロ秒の表示)を使う必要があったのですが、手元の CentOS 5.6 では PHP のバージョンが 5.1.6 であった為、マイクロ秒表示のオプションを使うことが出来ません。

1
2
3
4
## php --version
PHP 5.1.6 (cli) (built: Nov 29 2010 16:47:46)
Copyright (c) 1997-2006 The PHP Group
Zend Engine v2.1.0, Copyright (c) 1998-2006 Zend Technologies

そこで PHP のバージョンを上げることにしました。